The Mother's Day Fundraiser is now closed*. The entries have been counted, random.org has been so kind as to generate a winning number, and the winner is ...
*drumroll*
No. 18., Enoch! We will be contacting you shortly to arrange delivery of the shawl. Congratulations!
Thank you so much to everyone who donated. You are helping us to step one step closer to meeting our child for the very first time! Isn't it amazing to think how, across the world, there's a child going to sleep (because there's about a 12-hour time difference) who's never met us, never thought of us, and here we are, with no idea who they are or what they will be like, and yet step by step our lives are drawing closer, until we are family. And all of y'all have been a part of that.
Thank you.
*Although of course if you'd like to give at any time, we'd be overjoyed! At this time it seems the best way to give is by check, made payable to Bethany Christian Services, mailed to us or to Bethany, 930 McCallie Avenue, Chattanooga TN 37403. We are having some technical difficulties with our online giving site.

creating a home, creating for fun, and creating a mess
Monday, May 4, 2015
Sunday, April 26, 2015
fail (verb): to fall short of sucess
This happened months and months ago, but I just discovered the pictures on my phone and they are so funny I had to share.
These pictures represent, I feel confident in saying, my single greatest cooking failure in the history of my marriage.


Don't forget about our adoption fundraiser! You could win a beautiful scarf and you'd be helping a wonderful cause!The deadline to be entered in our giveaway is May 3rd. For more details, go here.
These pictures represent, I feel confident in saying, my single greatest cooking failure in the history of my marriage.
Now, I know that there are many kind, experienced cooks out there that are wanting to reach out through their compute screens and pat me on the shoulder right now and say, "Don't worry, Libby. Gingerbread is tricky. The cookies are really thin and they burn pretty easily. Don't beat yourself up about it. You'll do better next time."
But here's the thing.
Those are SUGAR COOKIES.
Have a second look, this time thinking, that dough started off white.
I know. I was a little awed, too. Truly a professional-grade burning job. All you have to do, really, is put a sheet of cookies in the oven, forget about them for an hour, then remember that the oven is on, turn it off, and leave the cookies in the oven til the next day when your son wants you to turn on the oven light and you wonder why you don't remember making gingerbread. It's very simple, although it does take time to achieve this quality of results.
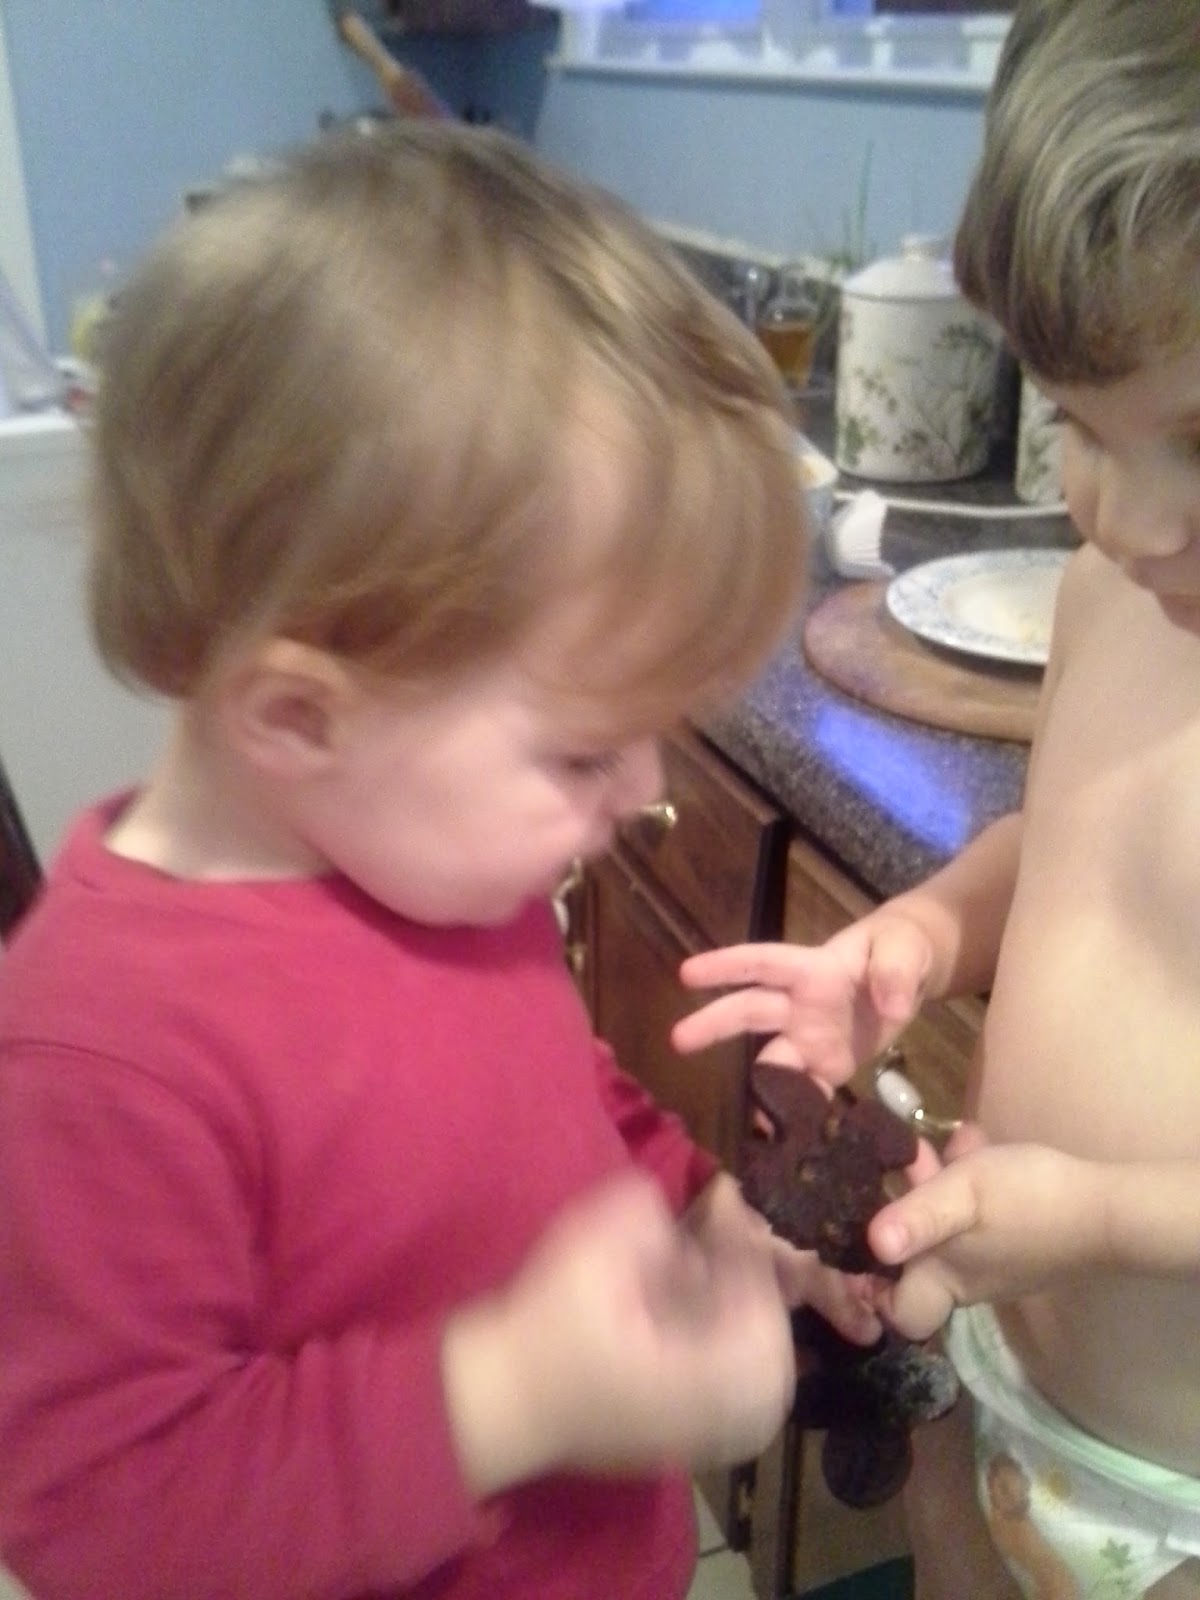
Munchkin was overjoyed to see cookies ...
... but when he discovered it tasted exactly like charcoal he handed it off to Twinkle.
Brotherly love, right there.
Don't forget about our adoption fundraiser! You could win a beautiful scarf and you'd be helping a wonderful cause!The deadline to be entered in our giveaway is May 3rd. For more details, go here.
Saturday, April 18, 2015
Easter Overalls
Several months ago, I happened upon a really cute fabric. The dinosaurs were friendly and bright and weren't licensed characters (I tend to be somewhat anti- licensed characters. If my child doesn't know who Barney is, why should he wear Barney pajamas? Anywhoo ....). Immediately a vision sprang into my mind. Dinosaur overalls! I hastily estimated how much fabric a pair of overalls would take, added a smidge for safety, and plopped down my money and forgot about the whole thing. The fabric languished on the "someday" dresser in my sewing room.
And would have continued to languish, long past Easter, had not a friend pinned a free overall pattern to her Pintrest board. It was by LiEr of ikatbag.com, whom I deeply admire and it was a size 3T - exactly what I needed. Also, did I mention, free. Clearly, this Easter overall thing was going to happen.
When I cut out the pattern and studied my fabric, I realized that I had enough fabric for TWO pairs of overalls, which was fabulous, because I happen to have two boys. (Twinkle is only 2, but he is a very sturdily built 2, and is currently straddling the fence between 2T and 3T. Besides, overalls are naturally adjustable.)
I very narrowly avoided making a terrible mistake, cutting out the overalls here. I was all set to cut and suddenly realized that this pattern has a right side up, and a wrong side up. If I had just doubled the fabric to cut out 2 sets (exactly what I was set to do), one of the sets of overalls' dinosaurs would have been upside down. So I cut off some of the fabric and layered it over the other fabric, so that the dinosaurs were right side up for both sets.

I did two things differently from the pattern.
1) I made the front chest piece separate from the bottom front pieces. You can see (maybe) from the pattern above that she has you cut out one big piece (twice) that you join by sewing them together down the center front and then that's your front piece, from the top of the bib to the pants legs. I wanted to be able to put in pockets (both my boys adore pockets, especially Twinkle) but I didn't want to have a sewn-on waistband, which is her solution for the top of the pockets needing to hide under another piece or in a seam. So I took the top straight dotted line as the top of my pants fronts, and then cut another piece for the chest, cutting it on the fold so that it was one piece. I then sewed my two front pants legs together, sewed on the pockets, and sewed the pants part to the chest part, thus "hiding" the top edge of the pockets in the seam between the pants and the chest piece. Capisce?
This was very simple to do and I'm very pleased how it turned out.
2) I made the overall straps several inches longer because they just looked short to me. The boys were sleeping, so I couldn't attempt to measure the straps against their shoulders to figure out if they were the right length, and they're fairly good sized boys. Munchkin has always been the tallest of his friends his age, and Twinkle earned the nickname "Tank" as an infant and has kept it ever since.
I should have trusted LiEr. They're now totally too long. This really doesn't matter, because the extra doesn't show, but I should have trusted LiEr.
A slightly tricky thing with LiEr's patterns is that, coming from a professional background, she doesn't put seam allowances on her patterns. You're supposed to add however much you prefer. 1/4, 1/2, 5/8, the world is your oyster. I comforted myself with the fact that I was making clothes for an active child, not assembling a nuclear warhead, and cut them out with a very approximate 5/8" seam allowance, measuring only occasionally to make sure that I had not strayed too far afield. This I did until ...

I did this. In case you can't tell the grievous nature of my error, that's the hem of the pants. Which I just cut out with a 5/8" seam allowance. Which is way too small. Notice that on most hems, the hem is at least half an inch wide? Sometimes more? That's because a wider hem is a) easier to work with and b) doesn't fold up as easily. A too narrow hem on pant legs is one of those rookie mistakes that just takes the shine off your otherwise well-made, professionally finished clothing item, which is certainly what I hoped that these overalls would be.
(For those of you who are confused and are saying "Isn't 5/8 more than half an inch? Wouldn't you still be ok?" I say: "No. You have to fold over the top edge of the fabric, and then fold it again so that you don't have a raw edge on the inside of your hem. If you just folded it once and sewed it down, it would fray. The making of well-made, professionally finished clothing is really just one long quest to eliminate all raw edges, ever.")
So what I did was this. I took a length of appropriately bright, wide bias tape and sewed it to the edge of the pants, folded it up, and sewed that edge down to make the hem. (Bias tape comes pre-made with folded edges.) This is what they used to do in the olden days when skirts or pants were let down as a person grew. When there wasn't enough fabric left to fold up to make a proper hem, they would use this exact technique, and in fact the reason that I happened to have neon orange bias tape on hand was because I had inherited it from my grandmother, who had bought it for just such a purpose. I think that's pretty cool.
At this point readers like my brother are rolling their eyes and saying "Enough with the technical crap, let's get to pictures of the boys!
OK, let's do.

Early morning selfie with Munchkin, looking pretty unthrilled with his awesome dinosaur overalls. Don't worry, he did cheer up later, especially when there were

BALLOONS.
This may not look like an excited face to you, but that's only because you cannot perceive the laser-like intensity with which he is holding that balloon.
(Yes! Our church gives out balloons to all the kids after the Easter service. Isn't that awesome?)

Again, the look is a little anxious, but trust me, Twinkle is having a good time here.
After church we went to the park and had a picnic with my parents and brother and sister. 'Stache bought the boys real soccer balls for their Easter gift, so most of what I saw of the boys for the rest of the afternoon was this.

Or this.

These are actually with zoom. It's a large park and they really love running.

Munchkin is sitting on Twinkle's ball here, and Twinkle is trying to steal it back. Despite 'Stache's buying IDENTICAL balls, they still knew whose were whose.
I was sneezing convulsively the whole afternoon and it still managed to be a pretty perfect day.
And would have continued to languish, long past Easter, had not a friend pinned a free overall pattern to her Pintrest board. It was by LiEr of ikatbag.com, whom I deeply admire and it was a size 3T - exactly what I needed. Also, did I mention, free. Clearly, this Easter overall thing was going to happen.
When I cut out the pattern and studied my fabric, I realized that I had enough fabric for TWO pairs of overalls, which was fabulous, because I happen to have two boys. (Twinkle is only 2, but he is a very sturdily built 2, and is currently straddling the fence between 2T and 3T. Besides, overalls are naturally adjustable.)
I very narrowly avoided making a terrible mistake, cutting out the overalls here. I was all set to cut and suddenly realized that this pattern has a right side up, and a wrong side up. If I had just doubled the fabric to cut out 2 sets (exactly what I was set to do), one of the sets of overalls' dinosaurs would have been upside down. So I cut off some of the fabric and layered it over the other fabric, so that the dinosaurs were right side up for both sets.
I did two things differently from the pattern.
1) I made the front chest piece separate from the bottom front pieces. You can see (maybe) from the pattern above that she has you cut out one big piece (twice) that you join by sewing them together down the center front and then that's your front piece, from the top of the bib to the pants legs. I wanted to be able to put in pockets (both my boys adore pockets, especially Twinkle) but I didn't want to have a sewn-on waistband, which is her solution for the top of the pockets needing to hide under another piece or in a seam. So I took the top straight dotted line as the top of my pants fronts, and then cut another piece for the chest, cutting it on the fold so that it was one piece. I then sewed my two front pants legs together, sewed on the pockets, and sewed the pants part to the chest part, thus "hiding" the top edge of the pockets in the seam between the pants and the chest piece. Capisce?
This was very simple to do and I'm very pleased how it turned out.
2) I made the overall straps several inches longer because they just looked short to me. The boys were sleeping, so I couldn't attempt to measure the straps against their shoulders to figure out if they were the right length, and they're fairly good sized boys. Munchkin has always been the tallest of his friends his age, and Twinkle earned the nickname "Tank" as an infant and has kept it ever since.
I should have trusted LiEr. They're now totally too long. This really doesn't matter, because the extra doesn't show, but I should have trusted LiEr.
A slightly tricky thing with LiEr's patterns is that, coming from a professional background, she doesn't put seam allowances on her patterns. You're supposed to add however much you prefer. 1/4, 1/2, 5/8, the world is your oyster. I comforted myself with the fact that I was making clothes for an active child, not assembling a nuclear warhead, and cut them out with a very approximate 5/8" seam allowance, measuring only occasionally to make sure that I had not strayed too far afield. This I did until ...
I did this. In case you can't tell the grievous nature of my error, that's the hem of the pants. Which I just cut out with a 5/8" seam allowance. Which is way too small. Notice that on most hems, the hem is at least half an inch wide? Sometimes more? That's because a wider hem is a) easier to work with and b) doesn't fold up as easily. A too narrow hem on pant legs is one of those rookie mistakes that just takes the shine off your otherwise well-made, professionally finished clothing item, which is certainly what I hoped that these overalls would be.
(For those of you who are confused and are saying "Isn't 5/8 more than half an inch? Wouldn't you still be ok?" I say: "No. You have to fold over the top edge of the fabric, and then fold it again so that you don't have a raw edge on the inside of your hem. If you just folded it once and sewed it down, it would fray. The making of well-made, professionally finished clothing is really just one long quest to eliminate all raw edges, ever.")
So what I did was this. I took a length of appropriately bright, wide bias tape and sewed it to the edge of the pants, folded it up, and sewed that edge down to make the hem. (Bias tape comes pre-made with folded edges.) This is what they used to do in the olden days when skirts or pants were let down as a person grew. When there wasn't enough fabric left to fold up to make a proper hem, they would use this exact technique, and in fact the reason that I happened to have neon orange bias tape on hand was because I had inherited it from my grandmother, who had bought it for just such a purpose. I think that's pretty cool.
At this point readers like my brother are rolling their eyes and saying "Enough with the technical crap, let's get to pictures of the boys!
OK, let's do.
Early morning selfie with Munchkin, looking pretty unthrilled with his awesome dinosaur overalls. Don't worry, he did cheer up later, especially when there were
This may not look like an excited face to you, but that's only because you cannot perceive the laser-like intensity with which he is holding that balloon.
(Yes! Our church gives out balloons to all the kids after the Easter service. Isn't that awesome?)
Again, the look is a little anxious, but trust me, Twinkle is having a good time here.
After church we went to the park and had a picnic with my parents and brother and sister. 'Stache bought the boys real soccer balls for their Easter gift, so most of what I saw of the boys for the rest of the afternoon was this.
Or this.
These are actually with zoom. It's a large park and they really love running.
 |
| My sister and brother with the boys. |
Monday, April 13, 2015
Another Step in the Adoption Journey
We're having a fundraiser! As many of you know, we are in the (long!) process of adopting a child from Hong Kong. We haven't been matched yet, but we know that our child will probably be a toddler and will have a special need.
If you'd like to know more about why we decided to go down this road, go here and click on Updates.
If you'd like to see a cute little video we made about our adoption (incidentally starring Munchkin and Twinkle), go here.


We have had our home study and the next big cost is our first program fee, $4,550. This money goes to our agency, Bethany Christian Services and helps pay for our case management. The total cost of our adoption will be about $18,000.
For more info about how that money is divided up, go here.
***
So now we're having our first fundraiser. We're going to have a drawing, and the prize will be a lovely little wrap that would be a perfect Mother's Day gift for a special woman in your life.
I knit this from Boboli Lace by Berrocco, which is a wool blend that is incredible soft and silky. The colorway is called Tree Swing and has beautiful natural shades of silver, charcoal and beige mixed together. The shawl has a gentle curve and a wide lace border.
It can be worn open ...
Or closed ...
Or it also looks nice tied ...
 |
So how will this drawing work? To be entered into the drawing you have to give a donation to our adoption fund. To donate securely online, go here. If you prefer to write a check, make it out to Bethany Christian Services and put "Matthew and Libby Fenn adoption" in the memo line. If it's convenient, you can give the check to us in person, or you can mail it directly to Bethany at
Bethany Christian Services
930 McCallie Avenue
Chattanooga, TN 37403
After you do that, email us at mfenn84 AT gmail DOT com (changing the AT to @, and the DOT to .) and give us your name and how much you donated.
Any donation up to $25 gets 1 entry.
Any donation between $25.01 and $50 gets 2 entries.
Any donation between $50.01 and $75 gets 3 entries.
Any donation between $75.01 and 100 gets 4 entries.
Any donation over $100 gets 6 entries.
So many chances to win that beautiful scarf!
The DEADLINE for this fundraiser is Sunday, May 3rd at 11:59 pm EST.
On Monday, May 4th, I will use a random number generator to select the winner and I will announce it on this blog. I will then mail the shawl to the winner. For addresses in the Continental US, it will be guaranteed to get there by Mother's Day, May 10. If the winner (or the winner's mother) lives outside the continental US, I will be happy to mail it to them with the speediest reasonably priced shipping available, but no guarantees on its arrival date.
Thank you for your support as we go on this journey!
Also many thanks to my sister for graciously responding to an urgent text asking her to come to my house and be a knitwear model! You're the best!
Saturday, April 11, 2015
Reading and Knitting

Reading: I'm reading The Nazi Officer's Wife on my kindle, which is about a Jewish woman during WWII. I'm finding it fascinating! Unfortunately since taking this picture my kindle has been relocated to a place that I'm sure made great sense to Munchkin at the time.
Knitting: I am knitting a cool little shawl/scarf thing. I knit (and knit and knit) a lacy border and now I'm knitting the body of the shawl. This shawl has been shall we politely say a challenge! It has the biggest lace pattern I've ever done, and I pretty much glued my nose to the chart the entire time. But I really think it's going to be awesome, which is particularly important because ...
*drumroll*
It's going to be part of a giveaway!
Starting on Monday, April 13, we are going to be doing a fundraising drive for our adoption. When we're done, we'll have a drawing and some generous donor will be getting a really nice* hand knit shawl in the mail! More details to come! Stay tuned!
*Right now, it does like kind of chewed. It's hard to see the potential, I know. But lace always looks like that before you block it. It's going to be fabulous, trust me and if you don't trust me, just wait for the pictures!
Wednesday, April 1, 2015
Serendipitous Froth
Until this morning I believed that there were three ways of
making frothed milk, that precious commodity that adds that little soupcon of
elegance that I so crave. 1) Purchase an
espresso machine that includes a milk-steaming feature (cost = $$$), 2)
purchase a milk-frothing gadget (cost = $), or heat milk in a saucepan until
steaming but not boiling and hold a whisk between your palms and rub your hands
back and forth to spin the whisk as rapidly as possible (cost = elbow grease)
But.
There is another way.
This morning there was no coffee in the house (and by coffee
I actually mean espresso. ‘Stache and I do not have a coffee pot, which
distresses and somehow surprises my parents every time they visit. Instead we
have an espresso pot*, which takes up less space. Depending on our mood, we add
hot water to the espresso to make americanos, which are essentially identical
to regular coffee, or we add hot milk to make lattes.) However, I did have 6
ice cubes of espresso in the freezer. And I had a fairly snazzy KitchenAid food
processor (made more perfect by the fact I paid only $2 for it). And I really
love frappuccinos. The path before me was obvious.
6 ice cubes of espresso, 1 cup of milk, 1 tsp of sugar, a
confident 15 seconds of pressing the “ON” button … did not produce a
frappuccino. Apparently the ice to liquid ratio was too low. What it did
produce, however, was more than 2 cups of coffee-flavored cold froth.
Now most of the time, frothed milk is a cup of steaming hot
milk with a quarter to half inch of froth at the top. You pour in the espresso,
and the milk underneath the froth mixes with it and you have a cappuccino or
something similar, depending on your proportions. This was not that. This was
solid froth from top to bottom and it was cold. It was fluffy and frothy and
felt like a treat, even though it was very ordinary ingredients that I drink
nearly every morning.
I did it again using plain milk with no ice to see if it
would work, and it did. It made froth more than double the volume of the milk I
put in. The boys were enchanted with this lovely treat and lobbied to have
their turn drinking from my cup.
This would be a great technique if you were trying to reduce
the amount of coffee you drank in the morning, as you could continue to drink
the same volume of coffee and milk, while stepping down your actual caffeine
intake. I think we’re going to mostly use it to make a quick, extremely cheap
treat for the boys. Milk + vanilla + sugar + 15 seconds = dessert!
*Gratuitous pictures of the boys from when they were little and cute. Instead of huge and cute. More current pictures coming soon, I promise.*


 |
| Not sure if Munchkin is hugging Twinkle or using him as a pillow. |
*For the uninitiated, an espresso machine is different from an espresso pot. The latter is simple, fairly cheap, and you put it on a stove eye to use it. The former is usually quite complicated, offers all kinds of options, is about 10x more expensive, and is an appliance that you plug in.
Saturday, March 28, 2015
"For I Am Sure"
A month ago, a friend of mine had a Terrifying Medical Thing
happen. She’s going to be fine, although getting back to 100% may take a long
time. Since she lives rather far away from me, it wasn't practical for me to
offer to take care of her kids, run errands, clean her house, or any of a dozen
things that a friend who’s dying to be helpful might offer to do. But what I
could do (other than pray for her, which I did and do) was to help keep her
warm. Thus, a quilt was born.
Because I wanted to make it quickly, it couldn't be too
intricate, but I wanted it to be personal. I was inspired by this quilt, and I
asked my friend’s husband if there was a slogan or Bible verse that was
particularly meaningful to them during this time. He said that they really
loved Romans 8:38-39, so I decided to put that verse on the quilt. I used 4 red
fat quarters (fat quarters are pieces of fabric that are approx 18”x22” and
fabric stores often have them pre-cut) and 7 gray fat quarters. I cut them
width-wise into strips 2 ½” wide. Then I shuffled them up into a roughly
random/roughly consistent pattern, and sewed them together, varying the seam
allowances by as much as 2” to get a staggered sort of effect. I had a few
strips left over.
Now, Rom 8:38-39 has
a lot of words (50, including the reference, if anyone’s counting), so
appliqueing the words was right out. Embroidery would have likewise taken an
age. So I decided to draw them. I got a fine tipped permanent fabric pen, and
very very slowly and carefully drew the letters. First I drew them with single
strokes, making the letters fairly big, and then would go back and draw a
second line and color in the space in between to make letters fatter. This
method worked fairly well, and I particularly recommend it for the amateur calligraphers
out there, because you can correct your mistakes and nobody will ever know.
After first drawing the letter, for instance an “o,” you can draw the second
line outside the circle to make the letter larger or inside to make the letter
smaller. Or if you magically drew it just the right size, you can use the first
line as your middle line and draw lines on either side to fill in.

There is something about writing words slowly and looking at
them a long time that makes you doubt yourself and your ability to spell, and
I’m still not 100% sure that there are no spelling errors in this quilt. If
there are – well, it was meant to be a labor of love, and it will not stop
being that if there are spelling mistakes in it. However, I think I’m probably
just making myself paranoid. When I was making an appliquéd plaque for my
sister the first Christmas after she got married, I became briefly convinced
that her name was Richardson instead of Richards. (It's definitely Richards, by the way. I checked.)
I pieced together the backing out of some black fabric and a
few fun black and white prints.
 |
| Paw prints! And daisies! |
 |
| I'd like to apologize for my very boring picture of a gray quilt against a gray house. Somehow when we were buying our home, picturesque spots for photo shots didn't make the must-have list. Also, I swear this quilt is a rectangle. It's just the clothespins that are making it look like a wonky hexagram. |
I also incorporated the label (the red square) into the middle of the backing. (The label has an inscription; you just can’t read it from this distance because I didn’t make the letters thick.) This label
in several ways made life a bit easier.
1. I didn't want to have to sew on the label by
hand, and I was going to have to sew pieces together anyway to have fabric big
enough for the backing.
2. I am new to machine quilting, and I knew that less
experienced, uneven quilting tends to make fabric shift/slide/stretch. If I had
put the red label on one of the edges, there was a fair chance it would have
ended up more of a trapezoid than a square, which would have driven me bonkers.
Putting it closer to the middle kept it square.
3. Two of the sides of the quilt had very uneven
edges because I was deliberately sewing the strips together in a staggered way.
Because of the shifting/stretching problem, I planned to do the quilting first,
then trim all the edges to make them straight. If I had put my label on one of
these edges, it would have ended up a rectangle instead of a triangle.
4. I wrote the inscription on the label before
quilting it. If I had make a mistake in the inscription after quilting the
whole quilt, it would have been a royal pain to correct it.
5. Because I was writing the inscription before
quilting, I had no idea exactly how the quilting lines would go across the
label. I didn't know if they would be spaced awkwardly in relation to the lines
of writing, or if the quilting might be wobbly. If I took pains to make the
writing perfectly straight and then the quilting lines were less than perfectly
straight, it would have been very obvious. So I wrote the description on the
diagonal instead and it worked quite well.
When I was squaring off the edges of the quilt, I discovered
that the edges that needed trimming were almost exactly the length of my coffee
table. This made the squaring off unprecedentedly easy. When I lay the quilt
out on the table, Twinkle (who had seen me sewing together strips but had not
seen the finished quilt) said, “Oh wow! Mama make the blankie!” How cute is that?
.JPG)
When I was taking this picture, Munchkin insisted on taking
some pictures of his own. Unfortunately my cell phone does not have a “macro”
function, so these art shots were a little less artistic than could be desired
and rather more like a three year old taking pictures with his mother’s phone.
.JPG)

After squaring off the edges, I made a bias binding and
sewed it on using this technique, which is now my hands-down favorite for
attaching the binding on machine-quilted quilts.
And then it was done! I’m so happy with how it turned out.
This is such a fun, easy way to make a very striking, modern quilt, and I think
the pattern is well suited to incorporating any sort of longish quote. What do you think?


Title: For I Am Sure
Design: Staggered gray and red strips with a Bible verse written on the red strips
Materials: 100% cotton fabric, polyester batting, permanent fabric pen
Finished: March 2015
Subscribe to:
Posts (Atom)